DNRGPS Application
The DNRGPS application was built to transfer data between Garmin handheld GPS receivers and the computer. It can be downloaded from the Minnesota DNR ArcView Resources web page (http://www.dnr.state.mn.us/mis/gis/DNRGPS/DNRGPS.html). For our purposes, the DNRGPS for ArcMap 10.2 will do. This is a ‘green’ application so all you need to do is unzip the package and run the dnrgps.exe.
Garmin GPSMAP 64
- Plug one end of the USB cable into the computer and the other into the Garmin (duh)
- It will take just a bit (maybe a minute or two) for Windows to recognize the device
DNRGPS Application
- Download the DNRGPS application, extract the contents of the compressed file, run the dnrgps.exe application
- If the name of your GPS receiver is not shown just below the menus, run the GPS >> Find GPS command
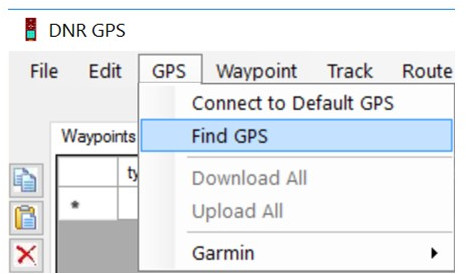
- You should now be connected and ready to either download or upload your waypoints/tracks/routes
Set User-Defined Projection
NOTE: If you are at this point, you should have a good idea of the coordinate system you plan to use. If you are unsure, rules of thumb are to 1) match the coordinate system of your base data (if using NAIP, then UTM), or 2) match the coordinate system of your existing GIS data (the decision has already been made), or 3) match what the USGS uses for your area (if you are working with a large area, say a region of the state or larger).
- File >> Set Projection
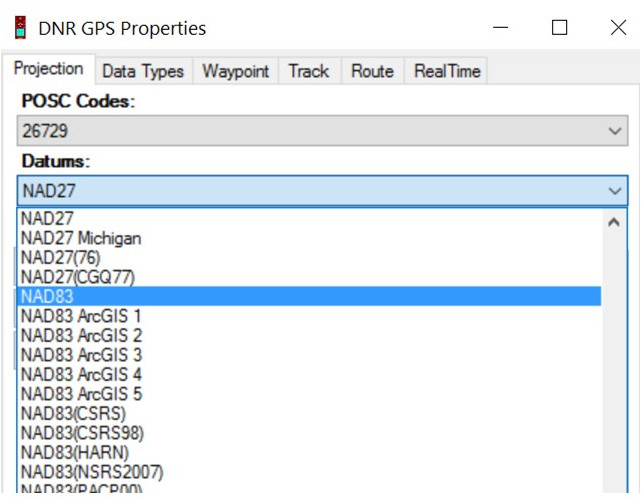
* For State Plane, select NAD27, then scroll down to the zone you will be working in (ie. Georgia East or Georgia West)
* For UTM, select NAD83, then scroll down to the bottom and select your “UTM zone …” (ie. UTM zone 17N for eastern GA or UTM zone 16N for western GA) - Hit OK to save your selections
Download Waypoints
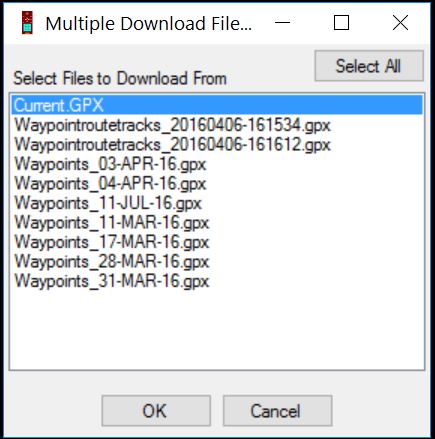
- Run Waypoint >> Download
- A pop-up window appears with a list of all GPX files on the device. Select the one(s) you want to download and hit OK
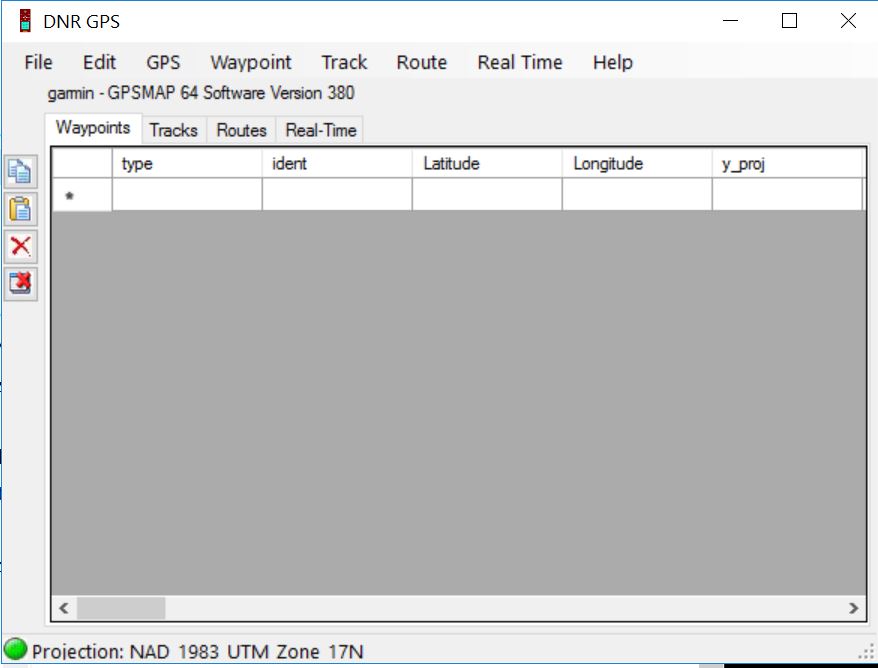
- Upon successful download, you will be presented with an Excel-like table that contains the waypoint’s name, latitude, longitude, y_proj, x_proj, comment, and probably many more fields.
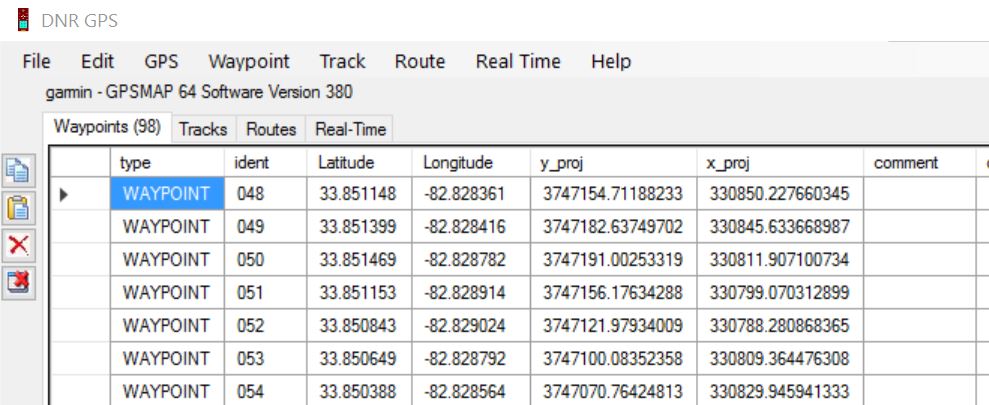
* ident is the name you gave the waypoint
* Latitude is the, ahem, latitude (Y coordinate)
* Longitude is the longitude (X coordinate)
* y_proj is the Y coordinate in the projection you specified above
* x_proj is the X coordinate in the projection you specified above
Export GPS Information
- File >> Save To >> File
- Navigate to your working directory
- Select the output type
* ESRI Shapefile (2D) is sketchy sometimes. Instead, use ‘Text File, comma-delimited (.TXT)’ to export the data out as a text file, and then bring it into ArcMap and create an event theme
* GPX is a standard GPS file format which makes it easy to transfer waypoints to different receivers
* Google Keyhole Markup Language is the KML file format - Name the new file and hit OK