Lab deliverable is highlighted in Orange about half-way through the lab.
Lab 10 is loosely based on the Agisoft Intermediate tutorial posted here: https://www.agisoft.com/index.php?id=35
Download photos from the March, 19, 2016 Botanical Garden flight (HERE). You will need to select all of the photos (tick box in upper right next to NAME). I also provide the Bot Garden orthophoto and DEM. They are in their own individual zipped file within your data download.
- Copy the zipped file you download to your e:\ drive
- Unzip all of the photos (use right-click>7Zip>Extract To BotGarden…)
- Your working directory will be E:\BotGarden_19Mar2016
Agisoft Installer: https://www.agisoft.com/downloads/installer/
- Download the Professional Windows X64 version
- Run the metashape-pro_1_…msi installer
- If you are prompted for an Administrator password, let me know. I must enter it for you.
Start Agisoft Metashape Professional
- Select ‘Continue using Metashape Professional in demo mode
- Typically, you would save your project (File>Save As) to your working directory. Since we are working in demo mode, you can’t
Agisoft Interface:

Workflow:
- Add Photos
- Align Photos
- Build Dense Point Cloud
- Build DEM – Not available in Demo Mode
- Build Orthomosaic – Not available in Demo Mode
- Export Dense Point Cloud, DEM, Orthomosaic – Not available in Demo Mode
Add Photos
- Workflow>Add Photos>…
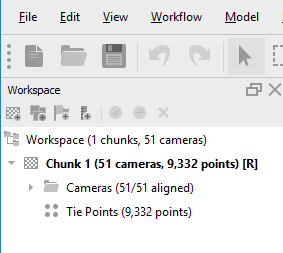
Align Photos
- Workflow>Align Photos…

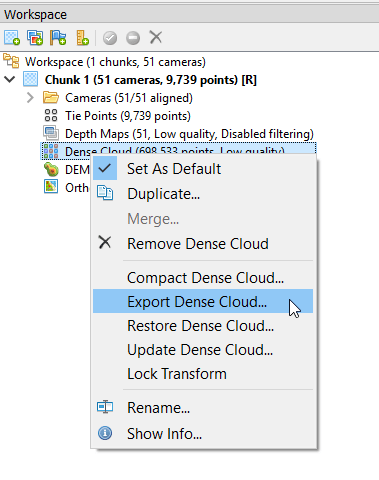
Build Dense Point Cloud


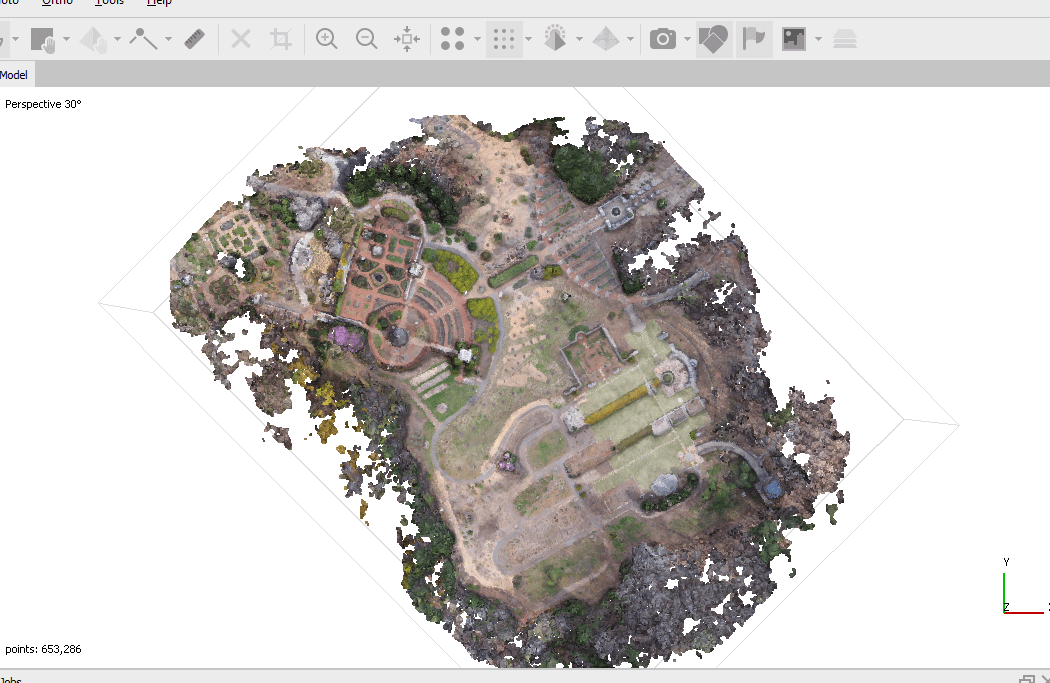
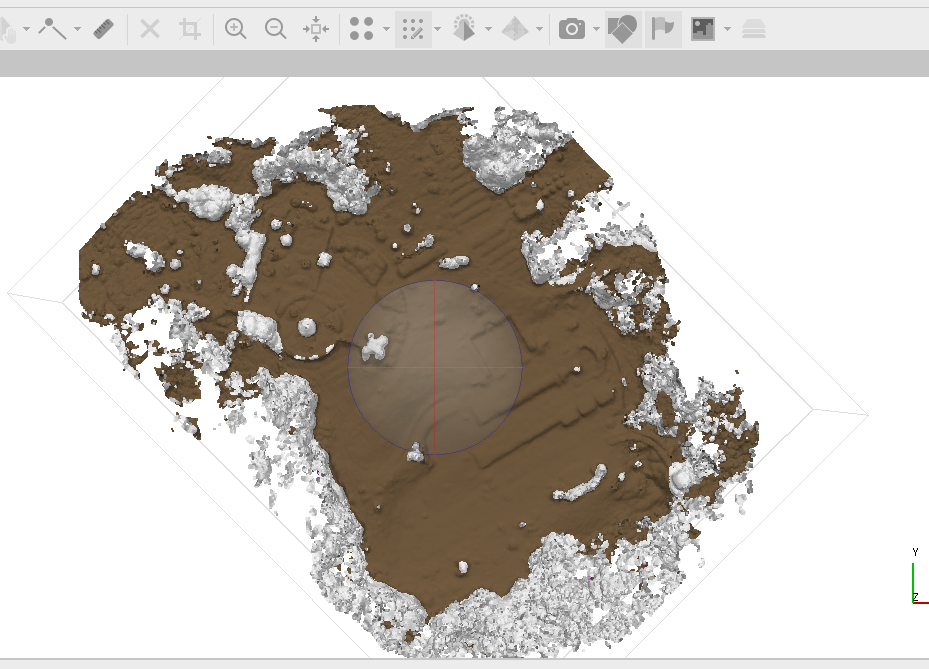
Grab the Navigation tool (  ), click-and-hold to rotate the point cloud. Use the scroll wheel to zoom in and out. Hit the number 0 on the keypad to reset your view.
Click the Cameras button (  ) to show the aligned camera locations.
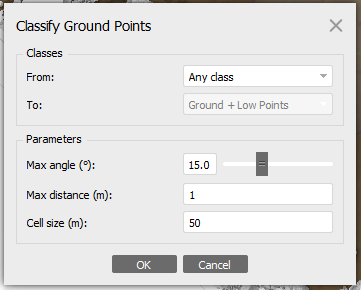
Classify Dense Point Cloud Ground points (Tools > Dense Cloud > Classify Ground Points)
- Display the Dense Cloud Classes (
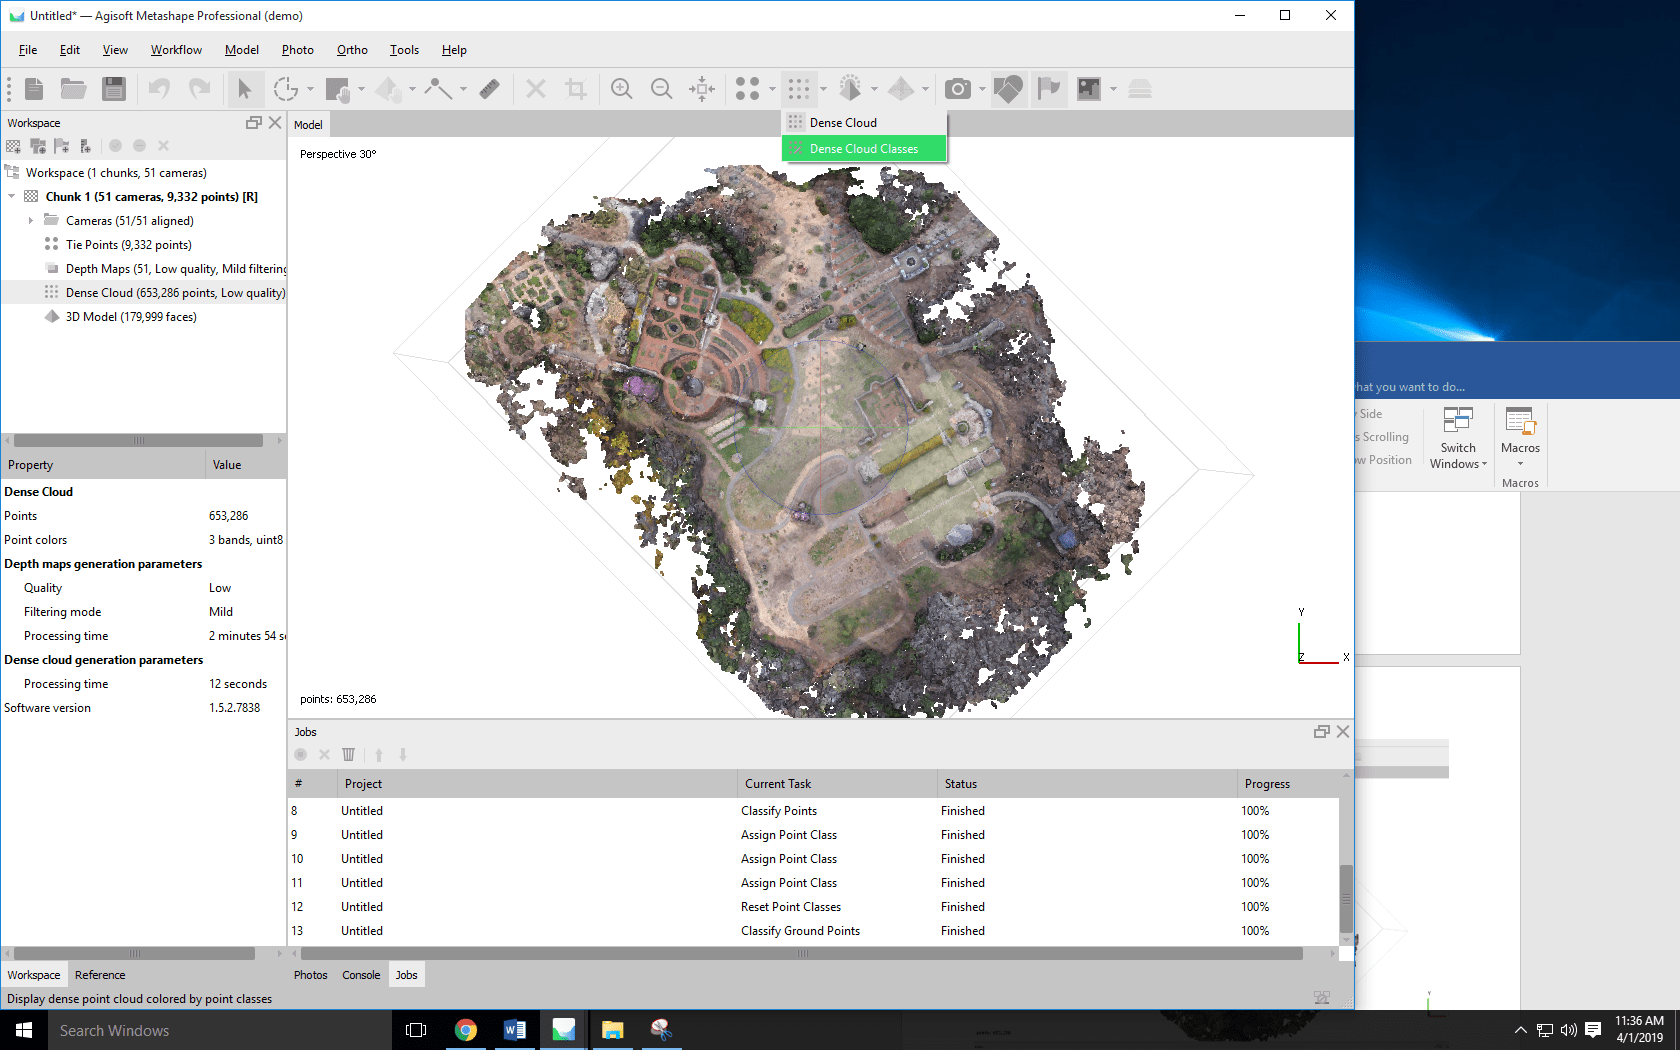 ). Your point cloud has not yet been classified so you will see shades of grey. Grey points are considered “Created (never classified)”
 - Tools>Dense Cloud>Classify Ground Points
-
- Max angle: …sets limitation for an angle between terrain model and the line to connect the point in question with a point from a ground class. In fact, this parameter determines the assumption for the maximum slope of the ground within the scene
- Max distance: … sets limitation for a distance between the point in question and terrain model. In fact, this parameter determines the assumption for the maximum variation of the ground elevation at a time.
- Cell Size: …Determines the size of the cells for point cloud to be divided into as a preparatory step in ground points classification procedure. Cell size should be indicated with respect to the size of the largest area within the scene that does not contain any ground points, e. g. building or close forest.
- Note that:
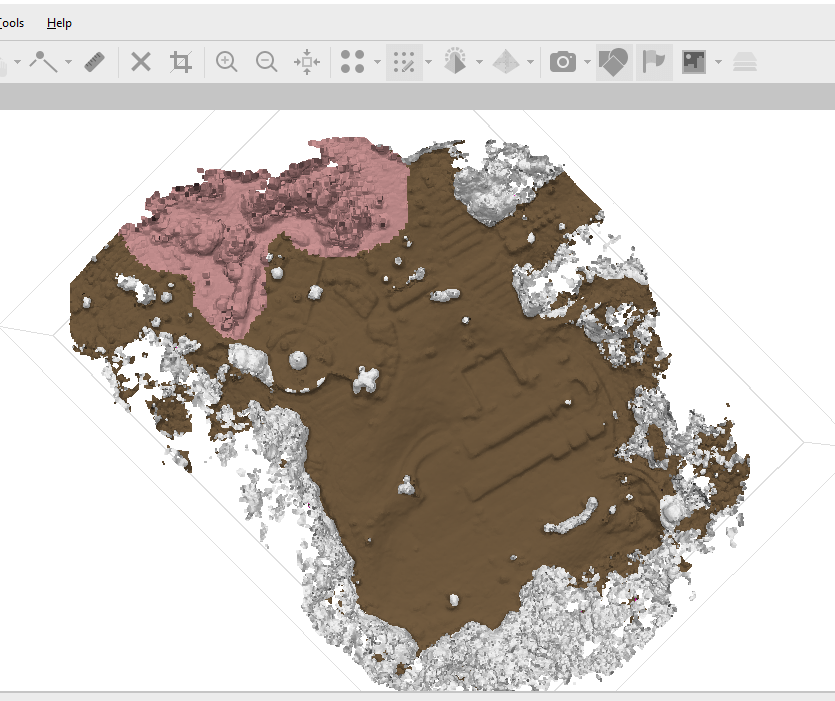
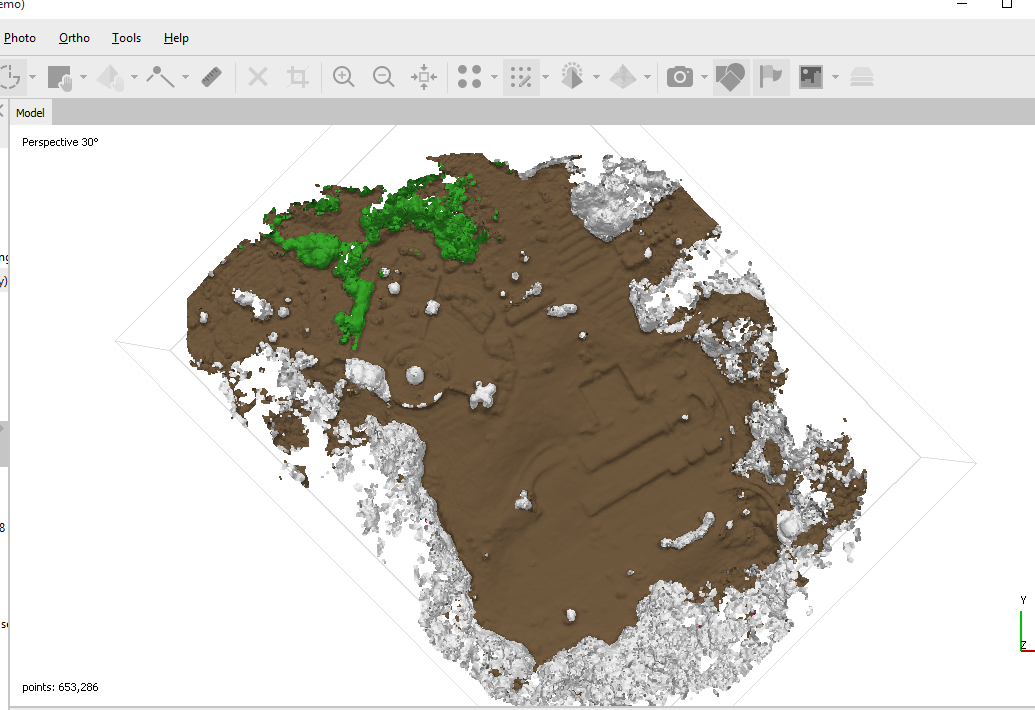
- Classified ground points are shown brown
- “Created (never classified)” points show grey
- “Created (never classified)” and “Unclassified” ARE unique classes
Your initial classification does an OK job separating the ground and surrounding trees. It doesn’t, however, do an acceptable job separating the terrace walls, gazebo, and several other close-to-the-ground features. Reset the classification, Tools>Dense Cloud>Reset Classification, and re-run the “Classify Ground Points” tool with adjusted parameters. Reset the classification and then re-run this ground classification in several batches. First run, set the MAX ANGLE to 1 (leave other parameters at 1 and 50). Take a screen shot of the results (<ALT-PrintScreen>) and paste it into a Word document). Reset the classification and then bump the MAX ANGLE to 10 and repeat. Then reset the classification and rerun using MAX ANGLE set to 45. You can try other values too! Visually, which MAX ANGLE produces the best result? Now, reset the classification, use your best MAX ANGLE and incrementally change the MAX DISTANCE parameter. I would start with 0.1 then maybe 0.5, 2, 10, 40 and try to zero-in on a value that produces visually-accurate results. Be sure to reset the classification each time before you run the next classification. Finally, after selecting your best MAX ANGLE and MAX DISTANCE values, use the same approach to determine a best CELL SIZE. Start with 1, then 25, then 50; this will help you figure out the direction in which you should proceed while using this boot-strap approach to finding a good CELL SIZE value. After each run, make sure you take a screen shot, paste it into a Word document and list the parameters. I would like you to recommend the “best” MAX ANGLE, MAX Distance, and CELL SIZE for this site as well as explain in your own words how these parameters affect your ground classification. Upload your Word document to the “Lab 10 – Agisoft Part 1” ELC Assignment Folder.
Manual classification of dense point cloud
In this small area case, you can easily manually assign the grey points – those “Created (never classified)” points – to the class of your choice.
- Select points using the Free-Form Selection tool (
 ). Click-and-hold and tract the features you want to select. Release the mouse when you are done drawing.
- Tools>Dense Cloud>Assign Class
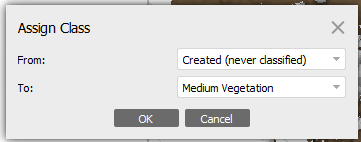
- From: specifies the point’s current classification
- To: is the class you want to assign to the selected points (that are currently assigned to the From class)
- This allows the user to over-select points when manually selecting
NOTE: You can remove points from a classification by 1) selecting the points, 2) Assign Class where the From Class: is Any and the To Class: is “Created (never classified). 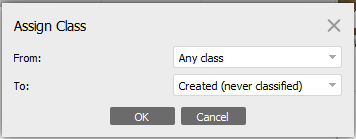
Select Points By Color:
You can select points by their color, too. Look under Tools>Dense Cloud>Select Points By Color  . From here, hit the “Select…” button
 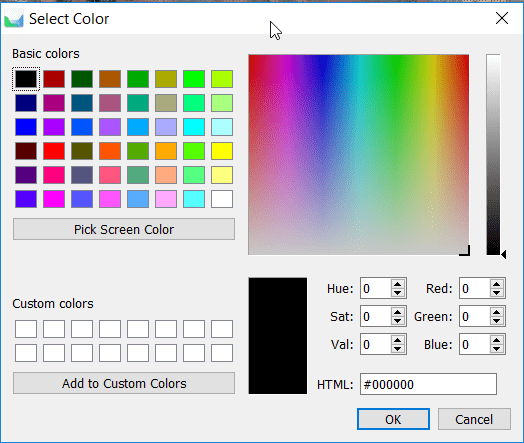 and then the “Pick Screen Color” button for the tool to manually select a color from the point cloud. After making your color-based selection, use the manual method of Assigning a Class described above.
Build DEM (Not available in Demo mode)

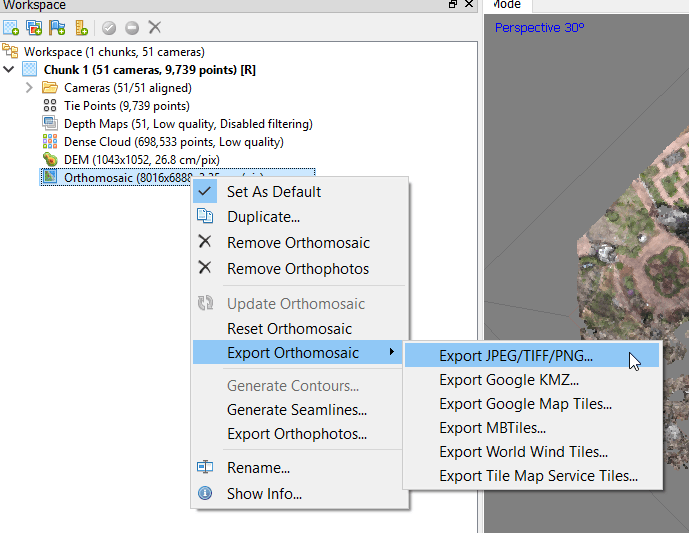
Build Orthomosaic (Not available in Demo mode)…

Exports (Not available in Demo Mode):
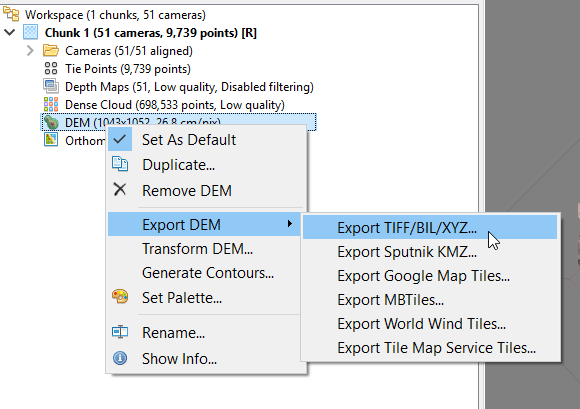
Export DEM:

Export Ortho:

Export Point Cloud: