In this lab, you will be processing drone data acquired on February 07, 2020 at the terraced section of the UGA Botanical Garden. The photos were captured with the DJI Phantom 4 Professional using the DJI Ground Station software running on an iPAD mini; the drone was set to fly at a height of 75 meters above ground level with a sidelap of 80% and an endlap of 80%. The mission resulted in 84 photos.
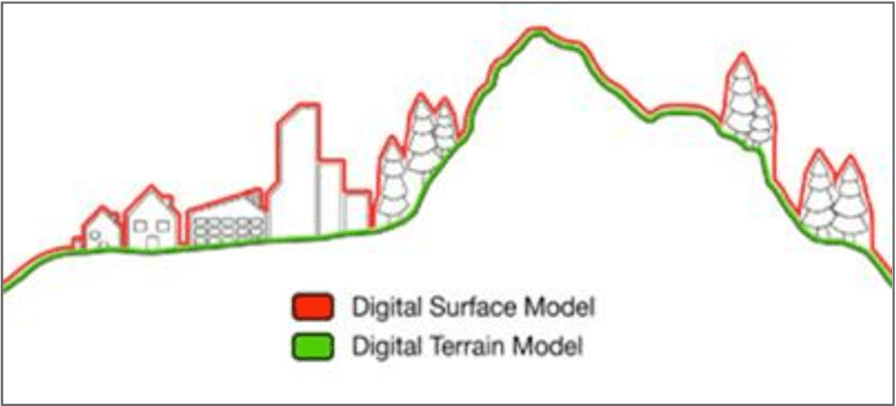
The You will use the LiDAR toolset in Global Mapper to generate an orthophoto, a bare ground “terrain” model and a “surface” model (includes trees, stumps, buildings, etc).
———————————————————————————
Pre-processing data management: Data management is a necessity. Sooner or later, you will need to develop a data management strategy – one that allows you to quickly browse your data directory and know what is there and where it was captured. I try to create a project folder with separate subfolders to store the unprocessed drone photos, outputs, and any other existing GIS data.
- Create a Lab06 working directory; I will name my WD “BotGarden_Feb072020″.
- Inside your working directory, create a folder called InputPhotos and another folder called OutputData
- Download lab data (>>>>>>>HERE<<<<<<< or from the class drive N:\FANR5640_7640\Spring2020\BotGardenTerrace_Feb072020.zip) and copy it over to your working directory. The compressed file size is ~700MB.
- Unzip your data file. Move photos ‘DJI_0029.JPG’ – ‘DJI_0104.JPG’ to the InputPhotos folder. You can delete the other photos.
———————————————————————————
Open Global Mapper v21.0 v22x
Pixels To Points Blue Marble Geo Help
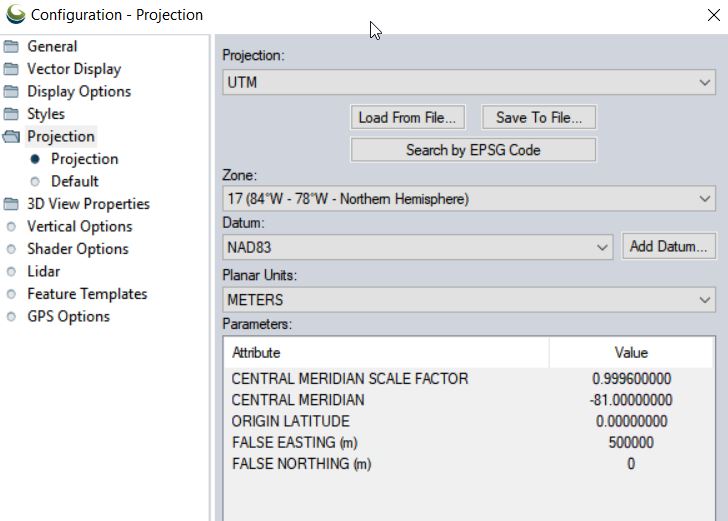
- Set Coordinate System: Tools > Configure > Projection > UTM/Zone17N/NAD83/METERS
- Save your project to your working directory
- File > Save Workspace As…
Convert UAV photos to point cloud using the Pixels to Points tool
- File > Open Data Files load UAV photos
- only load the JPGs
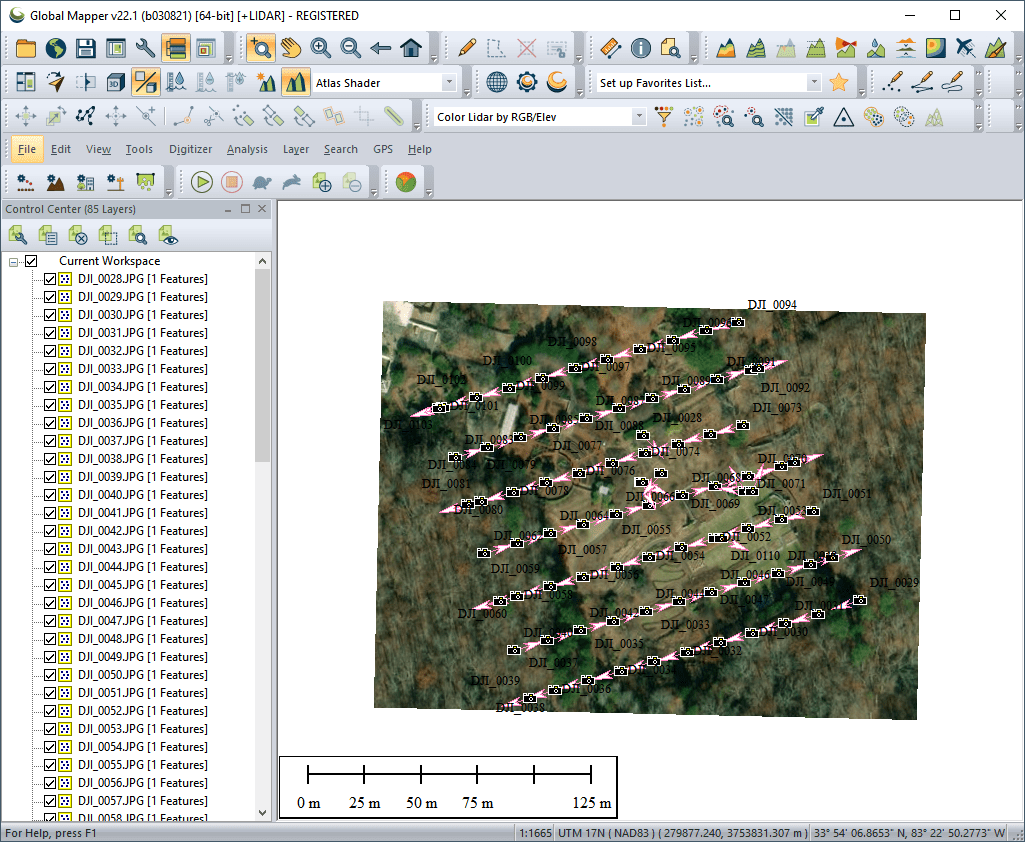
- For context, load a basemap
- File > Download Online Imagery…
- Select World Imagery
- This is what you should see on your screen…
- Save your workspace
- Load Pixels-To-Points (PTP) tool (located on the LiDAR toolbar, last icon on the right)

- From the PTP tool
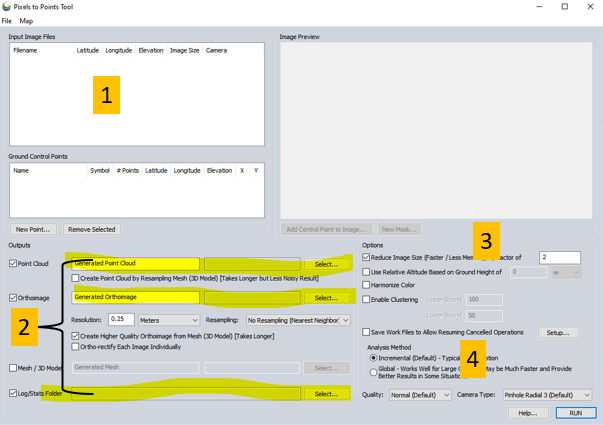
- (1) Input Image Files: right-click > Add Loaded Pictures…
- (2) Point Cloud/Orthoimage/Mesh/Log Output: Save “BG072020_pointcloud” (in GMP Global Mapper format) in your <working directory>\OutputData folder
- (3) Reduce Image Size: (use 8 to speed processing for lab) down-samples the original images which decreases processing time
- (4) Analysis Method: means by which matching points are located on UAV photos
- Incremental: The Incremental method starts from two images, and progressively adds more, recalculating the parameters and locations of the points to minimize the error.
- Global: considers the keypoints across all images at the same time.
- Hit RUN
- This process will take about 12 minutes with the above settings.
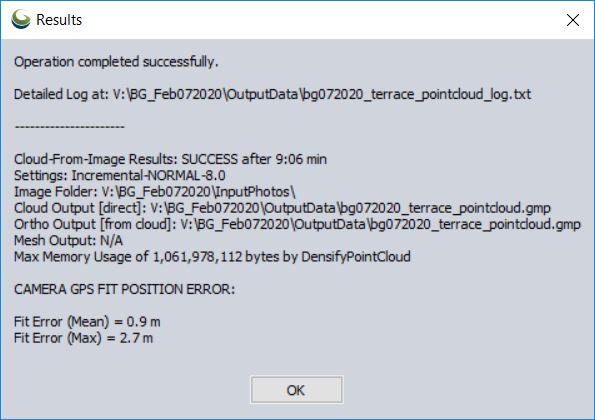
Output of Pixels To Points tool
Remove the individual drone photos (select the first photo, hold shift and click the last photo > hit the DEL key on your keyboard)
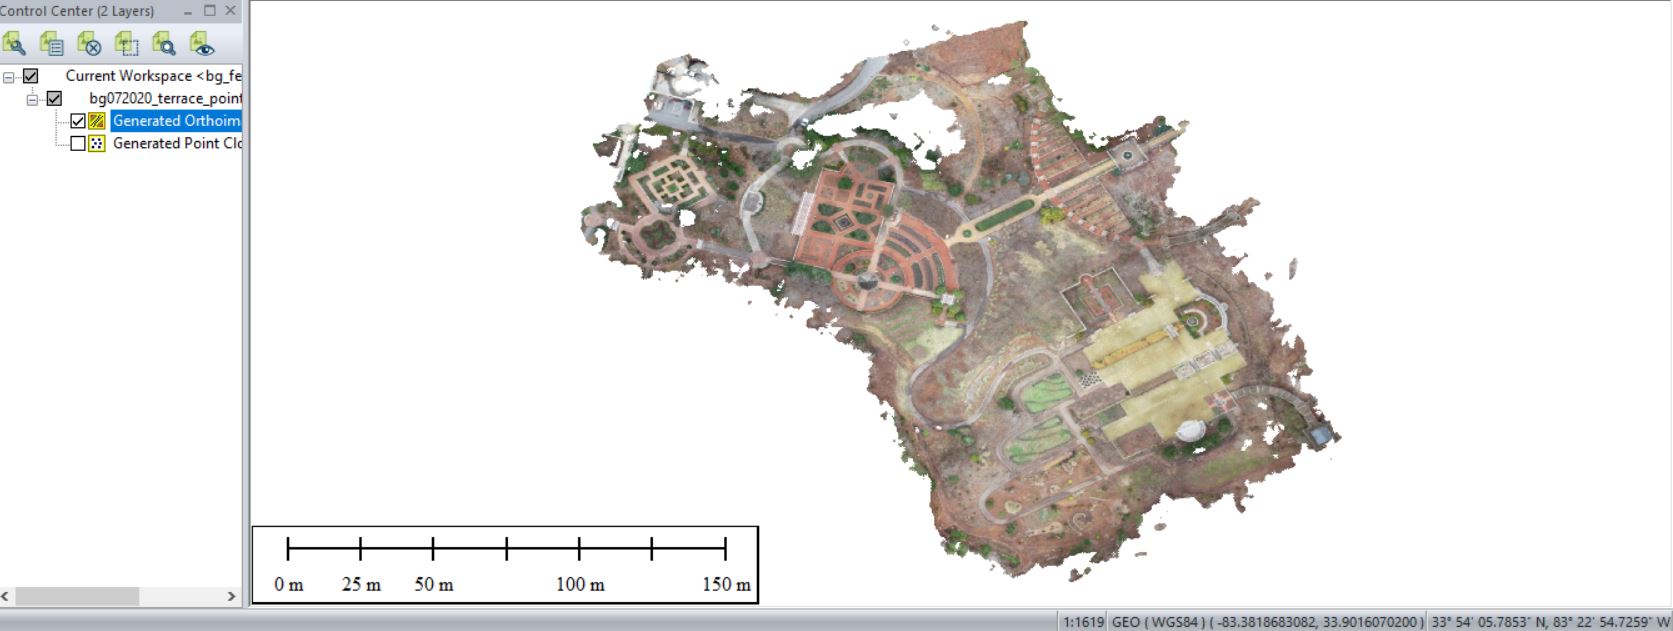
Save your outputs in a common GIS-ready format:
- Right-click on the layer you want to export from Global Mapper > EXPORT… > select your file type > name your output & hit Apply/OK
- Save your point cloud as a LAS file
- Save your other raster layers as an ERDAS Imagine File
Create surface and terrain models
I reprocessed these photos using high settings (resample by 1.2 instead of 8). Download my output (>>>>>>>HERE<<<<<<< in Global Mapper file format) and load them to your Global Mapper project (File > Open Data Files). Lets explore the point cloud…
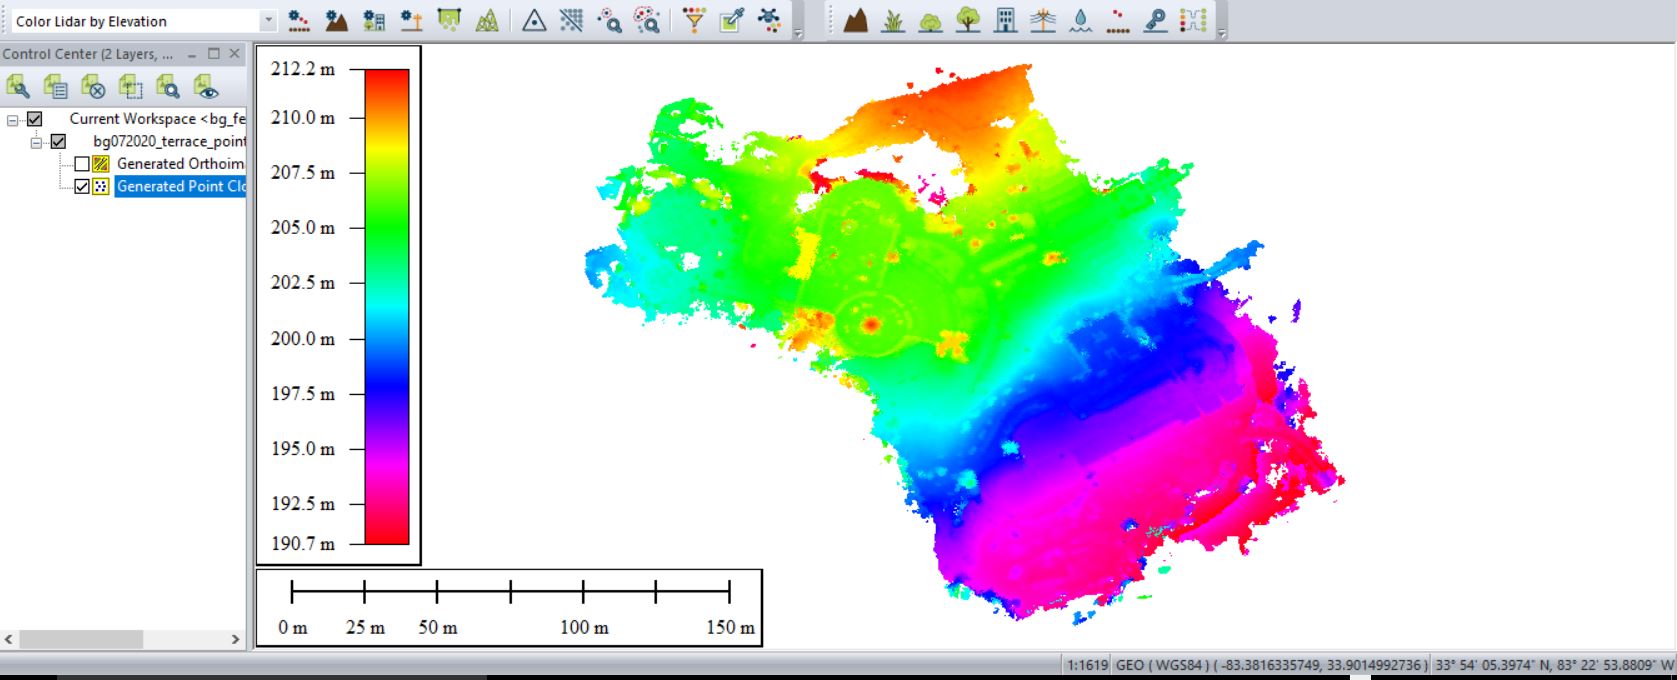
Analysis pull-down-menu > ‘Create Elevation Grid from 3D Vector/Lidar Data’ tool…
- Turn the point cloud layer on/select the layer in the layer list
- Analysis pull-down-menu > Create elevation grid from…
- Grid Method ‘Maximum Value – DSM’ to create a surface model
- Grid Method ‘Minimum Value – DTM’ to create a terrain model
Other Analysis tools
- Generate contours (from the DTM)
- Generate watershed
- must create a point layer using the create point layer tool, then

- select the point using the digitizer tool
 , then
 - in the Generate Watershed dialog, specify ‘create watershed areas showing drainage to selected points‘ in the watershed generation options section of the dialog
- must create a point layer using the create point layer tool, then